Venturing into the great outdoors is an incredible experience, right? The fresh air, the stunning views, that feeling of being truly away from it all… But let’s be real, getting lost can quickly turn that dream trip into a nightmare. That’s where solid navigation skills come in. This guide is designed to equip you with the basics you need to explore confidently and safely. We’ll cover everything from understanding maps and compasses to using GPS and even what to do if things go sideways.
Why Navigation Skills are Essential for Campers
Think of navigation as your lifeline in the wilderness. It’s not just about knowing where you are; it’s about being able to make informed decisions, avoid hazards, and handle unexpected situations. Honestly, it’s one of the most important skills you can develop as an outdoors person.
Without a grasp on navigation, you’re essentially wandering around with a blindfold on. What if a well-marked trail disappears due to weather, fallen trees, or just plain neglect? What if you need to find an alternate route back to camp before nightfall? Navigation skills allow you to adapt and overcome these challenges, ensuring you return safely. Plus, knowing how to navigate boosts your confidence and lets you fully enjoy the experience without that nagging fear of getting lost.
Understanding Topographic Maps: Your Window to the Terrain
A good topographic map is like having a detailed, three-dimensional model of the landscape in your hands. It shows you not just roads and trails, but also elevation changes, water sources, vegetation, and other important features that can help you plan your route and understand the terrain.
What Are Topographic Maps? Topographic maps, or “topo maps,” are different from road maps. They use contour lines to represent elevation changes. Each line connects points of equal elevation, giving you a visual representation of hills, valleys, and slopes. The closer the lines, the steeper the terrain. You know what? These maps are super useful for planning a hike that matches your fitness level!
Key Elements of a Topographic Map: Familiarize yourself with these elements:
- Contour Lines: These lines show elevation. The closer they are, the steeper the slope.
- Legend: This explains the symbols used on the map, such as trails, roads, buildings, and water sources.
- Scale: This tells you the relationship between distances on the map and corresponding distances on the ground. Common scales include 1:24,000 (1 inch on the map equals 24,000 inches, or 2,000 feet, on the ground).
- North Arrow: Indicates the direction of true north, magnetic north, and grid north (more on that later).
How to Read Contour Lines: Understanding contour lines is critical. Imagine pouring water onto the landscape – each contour line represents where the shoreline would be at different water levels.
- Closely Spaced Lines: Indicate a steep slope.
- Widely Spaced Lines: Indicate a gentle slope.
- Concentric Circles: Usually indicate a hilltop or a depression.
- “V” Shapes: Usually indicate a stream or a valley. The “V” points uphill.
Practical Exercise: Grab a topographic map of your local area or a place you plan to visit. Try to identify hills, valleys, and streams using the contour lines. Picture yourself walking through that terrain. Can you visualize the steepness of the slopes? It takes practice, but it’s an invaluable skill.
Understanding Map Scale: Map scale is essential for relating the map to the real world. A 1:24,000 scale map is common for hiking, allowing you to see reasonable detail. Larger scale maps (e.g., 1:10,000) show even more detail over a smaller area. Smaller scale maps (e.g., 1:100,000) cover wider areas with less detail.
Let me explain with an analogy. Think of map scales like zooming in on a photograph. A 1:24,000 map is like zooming in enough to see individual trees, whereas a 1:100,000 map is like zooming out to see the forest as a whole but losing some finer details.
Mastering the Compass: Your Directional Guide
While GPS devices are great, they rely on batteries and satellite signals – things that can fail you in the backcountry. A compass, on the other hand, is a simple, reliable tool that works anywhere, anytime providing you know how to use it!
Parts of a Compass: Let’s break down the anatomy of a compass. A standard baseplate compass has these key parts:
- Baseplate: The clear plastic base that you lay on the map.
- Magnetic Needle: The magnetized needle that points to magnetic north.
- Rotating Bezel (Compass Housing): The outer ring with degree markings (0-360).
- Orienting Arrow: An arrow inside the compass housing used for aligning the compass with the map.
- Index Line: A line on the baseplate that you use to read your bearing.
Understanding Declination: Here’s the thing – magnetic north isn’t the same as true north (the geographic North Pole). The angle between them is called declination, and it varies depending on your location. You need to correct for declination to get accurate bearings.
How to Adjust for Declination: Some compasses allow you to adjust for declination directly on the compass. If yours doesn’t, you need to add or subtract the declination angle from your bearings. You can find the declination for your area on topographic maps or online declination finders.
For example, if the declination is 10 degrees East, you would subtract 10 degrees from your compass bearing to get the true bearing. If the declination is 10 degrees West, you would add 10 degrees. (East is least, west is best!)
Taking a Bearing From a Map: This is how you translate information from the map to the real world:
- Place the edge of the baseplate along your desired line of travel on the map (e.g., from your current location to your destination).
- Rotate the compass housing until the orienting arrow aligns with north on the map (usually the top of the map). Make sure the “N” on the compass housing points to north on the map.
- Read the bearing from the index line.
- Correct for declination (add or subtract the declination angle).
Following a Bearing in the Field: Now, let’s take that true bearing and use it to navigate:
- Hold the compass level in front of you.
- Rotate your body until the magnetic needle aligns with the orienting arrow inside the compass housing.
- Choose a landmark in the distance that lies along your bearing.
- Walk towards that landmark.
- Repeat as needed, picking new landmarks as you go.
Back Bearings: Imagine you’re walking along a bearing and want to return to your starting point. To do this, you’ll take a back bearing. If your bearing is less than 180 degrees, add 180 degrees. If it’s more than 180 degrees, subtract 180 degrees. This gives you the reciprocal bearing to follow back.
Practical Exercises: Practice taking bearings from a map and following them in a safe, open area. Get comfortable aligning the compass, correcting for declination, and picking landmarks. Try navigating a simple course with multiple legs. Seriously, practice makes perfect!
By the way, did you know that some advanced compasses have extra features like sighting mirrors for precise bearing taking, or inclinometers for measuring slope angles? These aren’t essential for beginners, but something to consider as you gain experience.
GPS Devices: Modern Navigation Tools
GPS (Global Positioning System) devices have revolutionized navigation, making it easier than ever to pinpoint your location and follow pre-planned routes. But remember, technology can fail, so it’s important to understand their strengths and limitations.
How GPS Works: GPS devices receive signals from a network of satellites orbiting the Earth. By analyzing these signals, the device can calculate your latitude, longitude, and altitude. Neat, huh?
Key Features of GPS Devices for Camping: Look for these features when choosing a GPS device:
- Waypoints: Allow you to mark specific locations (e.g., campsites, water sources, trail junctions).
- Routes: Allow you to create and follow pre-planned routes.
- Tracks: Record your path as you travel, allowing you to retrace your steps if needed.
- Basemaps: Pre-loaded maps of the area.
- Durability and Battery Life: Crucial for backcountry use.
Using GPS for Navigation: Here’s a basic workflow:
- Plan Your Route: Before you go, create waypoints for key locations and connect them to form a route using mapping software like CalTopo or Gaia GPS.
- Upload to Device: Transfer your waypoints and routes to your GPS device.
- Navigate in the Field: Follow the on-screen directions to navigate to your desired waypoints and along your planned route.
- Record Your Track: Enable track recording to create a digital record of your journey.
Limitations of GPS: Never rely solely on GPS. Batteries die, signals get blocked by trees or terrain, and devices can fail. Always carry a map and compass as a backup and know how to use them.
GPS Apps on Smartphones: Smartphones can also be used for GPS navigation, thanks to apps like Gaia GPS, AllTrails, and BackCountry Navigator. These apps often offer downloadable maps, track recording, and other useful features. But again, battery life is a major concern, so bring a portable power bank and consider airplane mode to save energy.
Battery Management: You know what? Battery life is the bane of every GPS user. Carry extra batteries or a portable charger. Turn off unnecessary features like Bluetooth and Wi-Fi. Use the device intermittently rather than constantly. Consider a solar charger for extended trips.
Practical Exercises: Get familiar with your GPS device before heading into the backcountry. Practice creating waypoints and routes, uploading them to your device, and following them in a familiar area. Learn how to troubleshoot common problems.
Honestly, a GPS device can be a lifesaver, but it’s just one tool in your navigation toolkit. Don’t become overly dependent on it. Understanding maps and compasses remains essential.
Trail Marking Systems: Following the Path
Trail marking systems are important. Trails are often marked with blazes, cairns, or other indicators to help you stay on course. Understanding these systems can prevent you from getting lost, especially in areas where the trail isn’t well-defined.
Types of Trail Markings:
- Blazes: Painted marks on trees, rocks, or posts. Common colors include white, blue, and orange. A single blaze usually indicates a straight path. Double blazes may indicate a turn, intersection, or hazard.
- Cairns: Stacks of rocks used to mark trails above the treeline or in rocky areas.
- Duct Tape/ flagging Tape: Small pieces of plastic tied to branches or posts. Colors can vary, but often used to show turns or hazards.
- Signs: Standard signs with place names and distances, and trail numbers. Signs are useful for confirming you’re on the right track, and knowing how far until a destination.
How to Interpret Trail Markings: Blazes are typically placed in a way that they are visible from a distance and indicate the general direction of the trail. Cairns usually mark the most logical route over rocky terrain, but can sometimes be misleading if not maintained.
What to Do When You Lose the Trail: If you haven’t seen a trail marking for a while, and you’re not confident you are on the trail, stop. Retrace your steps to the last confirmed trail marking. From there, carefully search for the trail, expanding your search area if necessary.
Never Assume: Never assume you know where the trail goes. Always look for confirmation of the trail’s direction, with markings you are seeing.
Leave No Trace: Never add or remove trail markings. This can confuse other hikers.
You know what? On a recent hike, I noticed a cairn that had clearly been knocked over, probably by an animal. I took the time to rebuild it, making sure it was as stable as possible. It’s a small act, but every bit helps.
Emergency Situations: Preparing for the Unexpected
Hope for the best, but prepare for the worst. That’s a good motto for any backcountry adventure. Here we’ll cover what to do if you get lost, injured, or encounter other emergencies.
What to Do If You Get Lost: The first thing is to stay calm. Panic can lead to poor decisions. Then:
- S.T.O.P.: Stop, Think, Observe, Plan.
- Retrace Your Steps: If possible, retrace your steps to the last known point.
- Shelter: If you can’t find your way back before dark, build or find a shelter.
- Signal: Signal for help using a whistle (three blasts is the universal distress signal), a mirror, or a fire.
Building a Survival Kit: Every camper should carry a survival kit with essential items such as:
- First-Aid Kit: Bandages, antiseptic wipes, pain relievers, blister treatment.
- Navigation Tools: Map, compass, GPS (with spare batteries).
- Fire Starter: Lighter, waterproof matches, fire starter cubes.
- Knife or Multi-Tool: For cutting, repairing gear, and other tasks.
- Shelter: Emergency blanket or bivy sack.
- Food and Water: High-energy snacks, water filter or purification tablets.
- Signaling Devices: Whistle, mirror.
- Headlamp or Flashlight: With extra batteries. A must have!
Dealing with Injuries: Knowing basic first aid is crucial. Get certified in wilderness first aid if possible. Common injuries include cuts, sprains, fractures, and hypothermia. Learn how to treat these injuries and how to improvise splints and bandages.
Signaling for Help: If you need rescue, try to signal for help. Use a whistle, mirror, or fire. If you have cell service, call for help, but remember that reception can be spotty in the backcountry.
Honestly, one of the scariest moments I had camping was when a sudden storm rolled in, and I was miles from camp. Luckily, I had a good rain jacket, a map and compass, and a bit of survival experience. I navigated through the storm and made it back safely. That experience taught me the value of preparation.
Camp Security: Staying Safe at Night
Camp security isn’t just about deterring wildlife; it’s also about protecting yourself from other potential threats. Careful planning and vigilance can go a long way in ensuring a safe and peaceful night’s sleep.
Choosing a Safe Campsite: Select a campsite that is:
- Away From Hazards: Avoid camping under dead trees or near unstable cliffs.
- Protected From the Elements: Choose a site that is sheltered from wind and rain.
- Legal: Camp only in designated camping areas or where dispersed camping is permitted.
Bear Safety: If you’re camping in bear country, take these precautions:
- Store Food Properly: Use a bear-resistant canister or hang your food from a tree at least 10 feet off the ground and 4 feet from the trunk.
- Keep a Clean Camp: Don’t leave food scraps or trash around your campsite.
- Carry Bear Spray: And know how to use it.
Securing Your Gear: Store your gear inside your tent or vehicle to protect it from the elements and theft.
Being Aware of Your Surroundings: Listen to the sounds of the night. Are there any unusual noises? Be aware of your surroundings and trust your instincts.
You know what? One time, I woke up in the middle of the night to the sound of rustling outside my tent. I grabbed my flashlight and peeked out, and there was a raccoon trying to get into my food bag. It wasn’t a bear, but it was a good reminder to always be vigilant.
Practice and Continuous Learning: Sharpening Your Skills
Navigation is a skill that requires practice and continuous learning. The more you practice, the more confident and competent you’ll become. So, let’s talk about how to hone those skills.
Regular Practice: Set aside time to practice your navigation skills regularly. It’s not enough to just read about it; you need to get out there and do it.
Attend Workshops and Courses: Consider attending navigation workshops or courses taught by experienced instructors. These classes can provide valuable hands-on training and feedback.
Learn From Others: Talk to experienced campers and hikers. Ask them about their navigation techniques and challenges. Learn from their experiences.
Stay Updated: Navigation technology and techniques are always evolving. Stay updated on the latest developments by reading books, articles, and online resources.
Start Small: Begin with simple hikes in familiar areas and gradually work your way up to more challenging terrain.
Let me explain by giving an example. It’s like learning a musical instrument. You can read all the theory you want, but until you pick up the instrument and practice regularly, you won’t become proficient. Navigation is the same way.
Remember, every journey into the wilderness is an opportunity to learn and grow. Embrace the challenges, stay curious, and never stop exploring. With the right skills and knowledge, you can confidently navigate any adventure that comes your way.
Happy trails!
Resources for Further Learning
Here are a few resources to help you on your navigation journey:
- REI Expert Advice: Navigation Skills
- Backpacker Magazine: Navigation Skills
- National Outdoor Leadership School (NOLS)
Frequently Asked Questions (FAQ)
What’s the difference between magnetic north and true north?
Magnetic north is where your compass needle points, influenced by the Earth’s magnetic field. True north is the geographical North Pole. The difference between them is declination, which varies by location.
How do I choose the right topographic map for my trip?
Look for a map that covers your intended area with a scale appropriate for your activity (1:24,000 is common for hiking). Ensure it’s up-to-date and includes the features you need (trails, water sources, elevation). USGS is a good source.
What should I do if my GPS loses signal?
Don’t panic. Switch to your map and compass. Use your last known location from the GPS to orient yourself on the map and continue navigating using traditional methods.
How often should I check my location on the map?
Check your location frequently, especially at trail junctions or after significant elevation changes. Every 30-60 minutes is a good starting point, adjusting based on terrain and visibility.
What are the key skills to learn for backcountry navigation?
Map reading, compass use, GPS proficiency, route planning, and emergency preparedness are the core skills. Practice each regularly and combine them for a comprehensive approach.
Should I rely solely on my smartphone for navigation?
It’s risky, even with downloadable maps. Smartphone batteries drain quickly, and signals can be unreliable. Always carry a dedicated GPS or a map and compass as backups.
What’s the best way to store food safely in bear country?
Use a bear-resistant canister or hang your food in a bag at least 10 feet off the ground and 4 feet from the tree trunk. Keep your campsite clean and free of food odors.
DISCLAIMER
Camping and backcountry navigation involve inherent risks. This guide provides general information and is not a substitute for professional training or expert advice. Always exercise caution, assess your skills and experience, and be prepared for unexpected conditions. The author and publisher are not responsible for any injuries, losses, or damages incurred while camping or navigating. Always adhere to local regulations and guidelines.
Categories
- Navigation & Safety (68)
- Shelter & Sleep (72)
Top rated products
-
 Ultimate AONIJIE Soft Flask 1000 ml/2000 ml with Water Filter Rated 5.00 out of 5
$38.70Original price was: $38.70.$26.97Current price is: $26.97. -
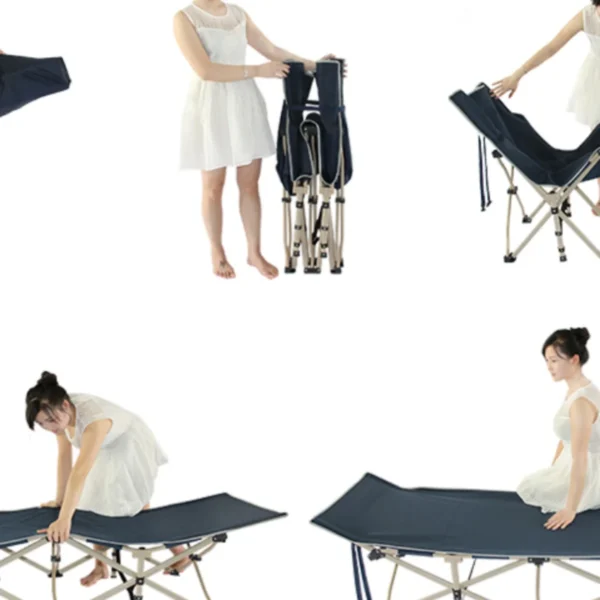
Portable Folding Bed for Office Naps & Outdoor Adventures Rated 5.00 out of 5$171.81 – $308.60Price range: $171.81 through $308.60
-
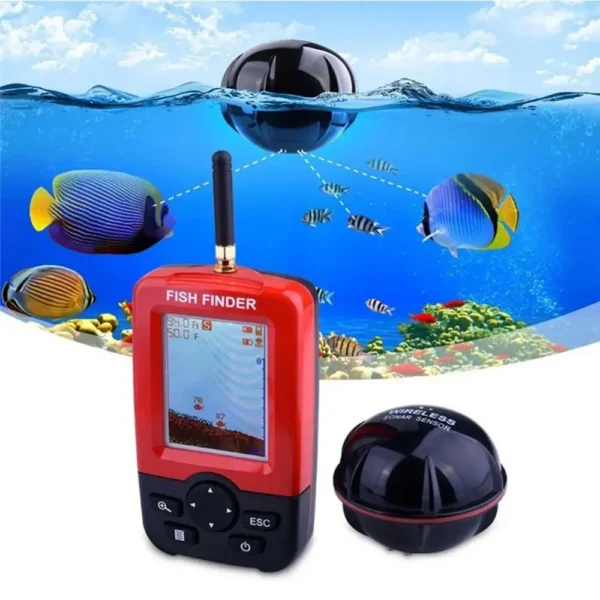
Smart Wireless Fish Finder: Elevate Your Fishing Experience! Rated 5.00 out of 5
$121.26Original price was: $121.26.$84.51Current price is: $84.51.

Product Gallery
-
 Ultimate 2-3 Person Inflatable Kayak for Fishing Fun Rated 5.00 out of 5$1,092.43 – $1,105.95Price range: $1,092.43 through $1,105.95
 -
VEVOR 550 lb Heavy-Duty Folding Wagon & Bench for Adventurers
$155.14 – $252.20Price range: $155.14 through $252.20
-
BISINNA One-Touch Titanium Tent for 3-4 Campers, Adventure Ready Rated 4.36 out of 5
$311.78Original price was: $311.78.$217.30Current price is: $217.30.


 Camping Gear
 Camping Chair
 Camping Table
 Camping Bed
 Sleeping Gear
 Storage Bags
 BBQ Portable
 Sleeping Bags
 Camping Tents
 Gazebos
 Outdoor Cooler
 Cookware
 Power
Power Camping Light
 Flashlight
 Portable Solar
 Power Banks
 Fish Finders
 Fishing Bags
 Fishing Jerseys
 Fishing Reels
 Fishing Chairs
 Fishing Bait Boat
 Fishing Floats
 Hard Baits
 Hiking Vests
 Outdoor Bags
 Water Filters
 Paracord
 Walkie Talkie
 Paddleboards
 Boats
Boats Sea Scooter
 Accessories
 Electric Bike
 Electric Scooter
Recent Comments