Why Bother with a Map and Compass? Seriously.
Okay, in an age of GPS watches and smartphone apps, why should you even bother learning how to use a map and compass? Good question! Think of it this way: technology can fail. Batteries die, screens crack, and satellite signals disappear faster than marshmallows around a campfire.
A map and compass? They’re reliable, rain-proof (mostly), and don’t need charging. Plus, there’s a certain satisfaction – a primal connection – that comes from truly understanding the land around you. Knowing how to navigate with these tools means you’re not just following a line on a screen; you’re reading the earth itself. It’s empowering, and honestly, kinda cool.
Let me explain something: ever been utterly lost, even for a few minutes? That feeling of disorientation? It’s not fun. Knowing you can find your way back, no matter what, is a game-changer. Whether you’re planning a weekend backpacking trip or just want to feel more secure on a day hike, mastering map and compass skills is a fundamental skill for any outdoor enthusiast. You know what? It could even save your life.
Understanding the Map: Your Paper Guide to Adventure
Think of a map as a bird’s-eye view of the world around you, shrunk down onto a piece of paper (or waterproof synthetic material, preferably!). But, it’s more than just a pretty picture. Understanding how maps work is crucial for effective navigation.
Map Essentials: What All Those Lines and Colors Mean
Here’s the thing: maps use a language of symbols, lines, and colors. Learning this language isn’t as daunting as learning a new spoken tongue, I promise! Key elements include:
- Scale: The ratio between a distance on the map and the corresponding distance on the ground. For example, a scale of 1:24,000 means that one inch on the map equals 24,000 inches (or 2,000 feet) on the ground. Understanding scale helps you estimate distances.
- Contour Lines: These are the squiggly lines that show elevation. Each line connects points of equal elevation, and the closer the lines are together, the steeper the terrain. Learning to read contour lines is like unlocking a 3D view of the landscape. I find that understanding contour lines makes all the difference!
- Contour Interval: The vertical distance between contour lines. This is usually noted in the map legend.
- Index Contours: Usually, every fifth contour line is darker and labeled with its elevation. These make it easier to read the map.
- Legend: The key to understanding the symbols used on the map. It will show you what different colors and symbols represent, such as trails, roads, buildings, water features, and vegetation.
- North Arrow: Indicates the direction of north. This is essential for orienting the map and taking accurate bearings.
Different Types of Maps: Choosing the Right One for Your Trip
Not all maps are created equal. The type of map you need depends on your activity and the level of detail required. Here are a few common types:
- Topographic Maps: These are the most common type for hiking and backpacking. They show elevation changes, natural features (like rivers and forests), and man-made features (like roads and buildings).
- Trail Maps: Often simpler than topographic maps, these focus on trails and essential landmarks. They may not show as much detail about elevation, but they’re great for staying on the path.
- Geologic Maps: Useful for understanding the underlying geology of an area. I usually use this to determine where I want to set up camp to avoid erosion areas.
- Nautical Charts: For navigating waterways, these show water depths, navigational hazards, and other important information for boaters.
Honestly, for most camping and hiking trips, a good topographic map will do the trick. Look for maps published by the U.S. Geological Survey (USGS) or reputable outdoor gear companies. In my opinion, always bring a paper map, even if you have a digital one on your phone. As i’ve stated, technology can fail!
The Compass: Your Magnetic Guide
The compass is your trusty sidekick, always pointing north. But it’s more than just a needle swinging around. Understanding how a compass works and how to use it in conjunction with a map is the key to confident navigation.
Anatomy of a Compass: Getting Familiar with the Parts
Let’s break down the anatomy of a typical baseplate compass:
- Baseplate: The clear plastic base that you lay on the map. It has a straight edge for drawing lines and taking bearings.
- Magnetic Needle: The magnetized needle that points to magnetic north.
- Rotating Bezel (or Compass Housing): The rotating ring around the compass with degree markings (0-360).
- Orienting Arrow: An arrow inside the compass housing that you align with the north lines on the map.
- Orienting Lines: Lines inside the compass housing that you align with the north lines on the map.
- Index Line (or Lubber Line): A line on the baseplate that you use to read the bearing.
There are other types of compasses, like digital compasses and lensatic compasses (often used by the military), but for most outdoor activities, a simple baseplate compass is all you need.
Understanding Declination: Why North Isn’t Always “North”
Here’s where things get a little tricky, but stick with me. Magnetic north (where your compass needle points) is not the same as true north (the geographic North Pole, which maps are based on). The difference between the two is called declination, and it varies depending on your location.
Why does this matter? If you ignore declination, your bearings will be off, and you could end up way off course. Most topographic maps will indicate the declination for the area. You’ll need to adjust your compass accordingly.
Here’s the thing: Declination can be either east or west. If the declination is east, you subtract it from your compass bearing. If it’s west, you add it. There are a couple of ways to deal with declination. Some compasses have an adjustable declination, where you can physically adjust the compass to account for the declination. If your compass doesn’t have this feature, you’ll need to manually adjust your bearings.
Honestly, understanding declination is one of the most important aspects of accurate navigation. Don’t skip this step!
Putting It All Together: Navigation in Action
Alright, now for the fun part: actually using your map and compass to find your way! It might seem daunting at first, but with a little practice, it’ll become second nature. This is where theory meets reality, and where the real adventure begins.
Orienting Your Map: Aligning Paper with Reality
Orienting the map means aligning it with the terrain around you. This allows you to easily identify landmarks and understand your position. Here’s how to do it:
- Lay your map on a flat surface.
- Place your compass on the map.
- Rotate the map and compass together until the north end of the magnetic needle aligns with the north arrow on the map (after accounting for declination, of course!).
- Now, the features on the map should match up with the features you see around you.
You know what? Practice orienting your map in different locations. The more you do it, the easier it will become. If you don’t have a compass, you align the map with the terrain. Find a prominent landmark on the ground and identify it on the map. Rotate the map until the landmark on the map lines up with the actual landmark.
Taking a Bearing: Finding Your Way From Here to There
Taking a bearing is the process of determining the direction from your current location to a specific destination. Here’s how it works:
- Identify your location and your destination on the map.
- Lay the edge of your compass baseplate on the map so that it forms a line between your current location and your destination. The direction-of-travel arrow on the compass should point towards your destination.
- Rotate the compass housing until the orienting arrow and orienting lines are aligned with the north lines on the map. Make sure you’re accounting for declination!
- Remove the compass from the map and hold it in front of you.
- Rotate your body until the north end of the magnetic needle aligns with the orienting arrow in the compass housing.
- The bearing to your destination is indicated by the index line (or lubber line) on the compass.
Now, follow that bearing! Choose a landmark in the distance that lies along your bearing and walk towards it. When you reach that landmark, take another bearing to your destination, and continue on your way. Let me explain: this is called “aiming off.” Instead of walking directly toward your target, you intentionally aim slightly to one side. That way, if you veer off course, you’ll know which direction to correct.
Following a Bearing: Staying on Course
Following a bearing is all about staying true to the direction you’ve determined with your compass. Here’s how to do it effectively:
- Keep the compass level: A tilted compass can give you an inaccurate reading.
- Look up frequently: Don’t just stare at your compass. Scan the terrain ahead and identify landmarks that lie along your bearing.
- Account for obstacles: If you encounter an obstacle (like a dense forest or a steep cliff), walk around it, maintaining your bearing as best you can. Once you’re past the obstacle, resume following your original bearing.
- Check your progress: Regularly check your map and compass to make sure you’re still on course. If you’re veering off, correct your direction immediately.
Honestly, following a bearing can be challenging, especially in difficult terrain. The key is to be patient, observant, and persistent. And always, always trust your compass!
Advanced Techniques: Taking Your Navigation Skills to the Next Level
Once you’ve mastered the basics, you can start exploring more advanced navigation techniques. These techniques will help you navigate in more challenging situations and become a truly skilled outdoorsman.
Triangulation: Pinpointing Your Exact Location
Triangulation is a method of determining your exact location by taking bearings to two or more known landmarks. This is especially useful when you’re unsure of your position on the map. Here’s how it works:
- Identify two or three prominent landmarks that you can also identify on the map.
- Take a bearing to each landmark.
- Convert those bearings to back bearings. A back bearing is simply the opposite direction of the bearing you took. To calculate a back bearing, add 180 degrees to your bearing (if it’s less than 180 degrees) or subtract 180 degrees (if it’s more than 180 degrees).
- On the map, locate the landmarks you used.
- Using a protractor or the edge of your compass, draw a line from each landmark along the back bearing you calculated.
- The point where the lines intersect is your approximate location.
Trust me, triangulation can be a lifesaver when you’re truly lost. Practice it regularly, and you’ll be amazed at how accurate it can be.
Using Terrain Association: Reading the Land Like a Book
Terrain association is the art of using the natural features of the landscape to navigate. This includes recognizing hills, valleys, rivers, forests, and other landmarks, and using them to confirm your location and direction. Here’s how to develop your terrain association skills:
- Study the map carefully before your trip. Pay attention to the terrain features in the area you’ll be hiking.
- As you hike, constantly compare the map to the terrain around you. Identify prominent landmarks and use them to confirm your location.
- Pay attention to elevation changes. Notice how the terrain slopes and how this corresponds to the contour lines on the map.
- Use natural features to guide your direction. For example, you can follow a river downstream or hike along a ridge.
You know what? Terrain association is a skill that develops over time with practice. The more time you spend in the outdoors, the better you’ll become at reading the land. It’s about developing a deep understanding of the relationship between the map and the territory.
Night Navigation: Finding Your Way in the Dark
Navigating at night presents unique challenges. Visibility is limited, and it can be difficult to identify landmarks. But with the right techniques, you can safely navigate in the dark.
- Use a headlamp or flashlight: This will help you see the terrain and your compass.
- Use a red light: Red light preserves your night vision better than white light.
- Take bearings frequently: It’s easy to wander off course in the dark, so check your compass regularly.
- Use the stars: If the sky is clear, you can use the stars to help you navigate. The North Star (Polaris) is always located in the north.
- Be extra cautious: Watch out for obstacles and be aware of your surroundings.
Honestly, night navigation is not for beginners. It requires experience and a high level of skill. Before attempting to navigate at night, practice in a familiar area during the day. That should ensure you are safe and aware.
Safety First: Essential Tips for Staying Safe in the Backcountry
Navigation is an important part of staying safe in the backcountry, but it’s not the only thing. Here are some other essential safety tips to keep in mind:
- Tell someone where you’re going: Let a friend or family member know your hiking plans and when you expect to return.
- Check the weather forecast: Be aware of potential weather hazards and pack accordingly.
- Carry extra food and water: It’s always better to have too much than not enough.
- Bring a first-aid kit: And know how to use it!
- Dress in layers: Be prepared for changing weather conditions.
- Carry a whistle: A whistle can be heard much farther than your voice.
- Learn basic survival skills: Knowing how to build a fire, find water, and build a shelter could save your life.
- Be aware of wildlife: Know how to avoid encounters with dangerous animals.
Let me explain: being prepared is about more than just having the right gear. It’s about having the knowledge and skills to handle unexpected situations. Take a wilderness first-aid course, practice your navigation skills, and be aware of the risks involved. That way, you can enjoy your time in the outdoors with confidence.
Practice Makes Perfect: Honing Your Skills Before You Hit the Trail
You wouldn’t try to run a marathon without training, right? The same goes for navigation. Here are some ways to hone your map and compass skills before you head out into the wilderness:
- Practice in your backyard or local park: Start with simple exercises like orienting the map and taking bearings to familiar landmarks. Also, try pacing at your backyard or in your yard.
- Take a navigation course: Many outdoor organizations offer courses on map and compass skills. Search the web or ask around.
- Join a hiking club: Hiking with experienced navigators is a great way to learn new skills.
- Use online resources: There are many websites and videos that can help you improve your navigation skills.
- Create your own orienteering course: Set up a series of checkpoints in a local park and practice navigating to each one using your map and compass.
Remember, navigation is a skill that takes time and practice. The more you practice, the more confident you’ll become. And the more confident you are, the more you’ll enjoy your time in the outdoors.
Frequently Asked Questions
DISCLAIMER
The information provided in this article is for general guidance only and should not be considered a substitute for professional training or expert advice. Outdoor navigation and camping involve inherent risks, and it is the responsibility of each individual to assess their own abilities and make informed decisions based on current conditions. Always prioritize safety, and never attempt activities beyond your skill level. The author and publisher are not responsible for any accidents, injuries, or damages that may occur as a result of using the information provided in this article.
Categories
- Navigation & Safety (68)
- Shelter & Sleep (72)
Top rated products
-
 Ultimate AONIJIE Soft Flask 1000 ml/2000 ml with Water Filter Rated 5.00 out of 5
$41.58Original price was: $41.58.$28.98Current price is: $28.98. -
Portable Folding Bed for Office Naps & Outdoor Adventures Rated 5.00 out of 5$168.06 – $305.16Price range: $168.06 through $305.16
-
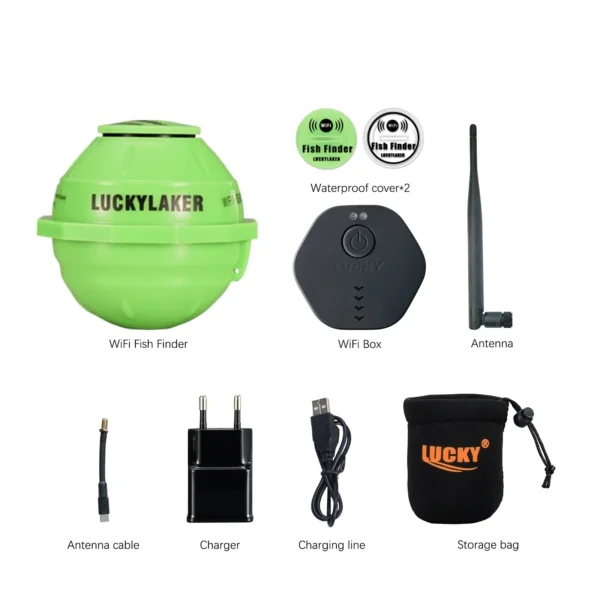
Revolutionize Your Fishing with Lucky Smart Wi-Fi Fish Finder Rated 5.00 out of 5
$197.75Original price was: $197.75.$137.82Current price is: $137.82.


Product Gallery
-
 Ultimate 2-3 Person Inflatable Kayak for Fishing Fun Rated 5.00 out of 5$1,081.72 – $1,095.09Price range: $1,081.72 through $1,095.09
 -
VEVOR 550 lb Heavy-Duty Folding Wagon & Bench for Adventurers
$155.14 – $252.20Price range: $155.14 through $252.20
-
BISINNA One-Touch Titanium Tent for 3-4 Campers, Adventure Ready Rated 4.36 out of 5
$311.78Original price was: $311.78.$217.30Current price is: $217.30.


 Camping Gear
 Camping Chair
 Camping Table
 Camping Bed
 Sleeping Gear
 Storage Bags
 BBQ Portable
 Sleeping Bags
 Camping Tents
 Gazebos
 Outdoor Cooler
 Cookware
 Power
Power Camping Light
 Flashlight
 Portable Solar
 Power Banks
 Fish Finders
 Fishing Bags
 Fishing Jerseys
 Fishing Reels
 Fishing Chairs
 Fishing Bait Boat
 Fishing Floats
 Hard Baits
 Hiking Vests
 Outdoor Bags
 Water Filters
 Paracord
 Walkie Talkie
 Paddleboards
 Boats
Boats Sea Scooter
 Accessories
 Electric Bike
 Electric Scooter
Recent Comments