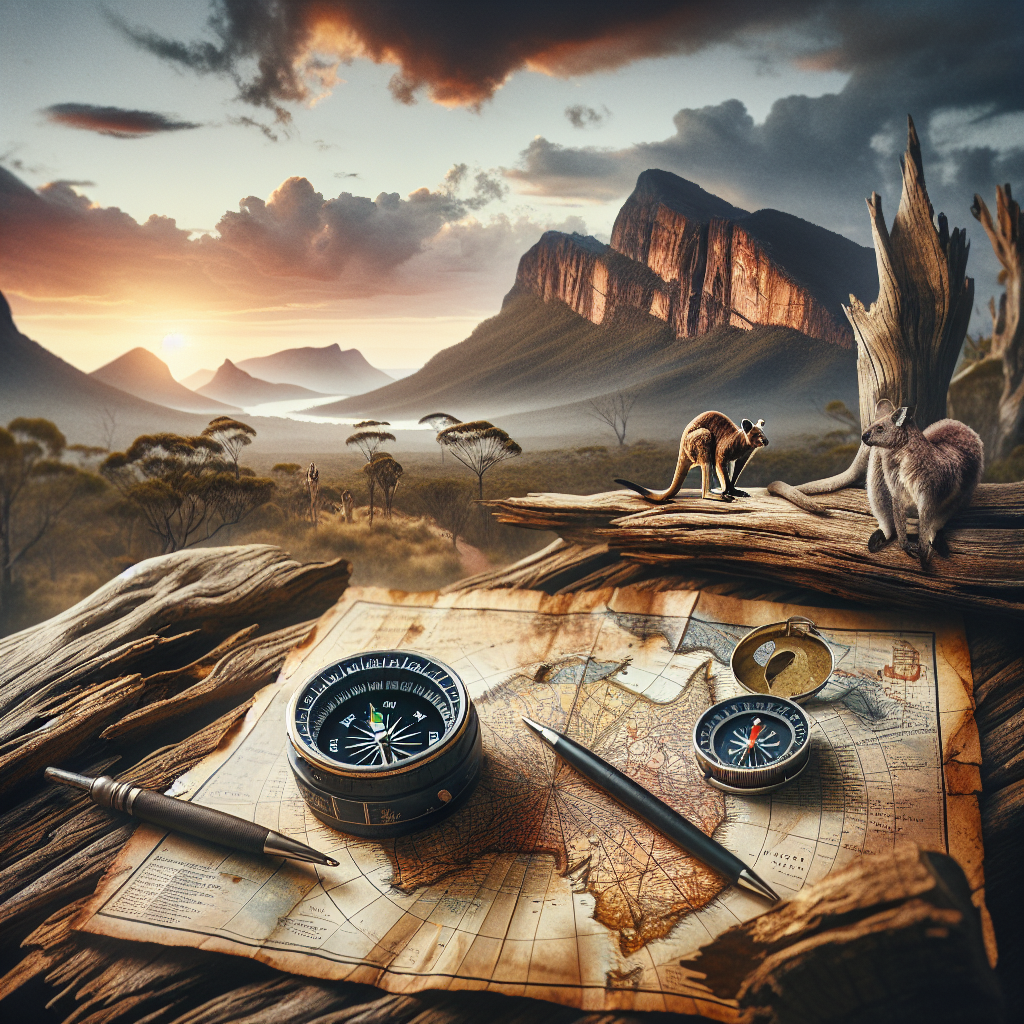
Conquer the Trails: Build Confidence with Map and Compass for Campers
<p>Venturing into the wilderness is exhilarating, right? The crisp air, the rustling leaves, the feeling of disconnecting from the digital world. But let's be honest, that excitement can quickly turn to anxiety if you're not sure where you are or how to get back. Relying solely on technology can be risky; batteries die, signals vanish, and suddenly you're staring at a blank screen. That's where the timeless skills of map and compass navigation come in. This guide will equip you with the knowledge and confidence to navigate the backcountry like a pro, ensuring your camping adventures are safe, fulfilling, and truly unforgettable. Ready to ditch the digital dependence and embrace the art of old-school navigation?Why Learn Map and Compass Skills?
Okay, so why bother with maps and compasses when you’ve got a fancy GPS watch and your phone? Great question! Here’s the thing: technology is amazing, until it isn’t. Batteries die, screens crack, and cell service laughs in the face of remote wilderness areas. A map and compass? They’re reliable, durable, and, dare I say, empowering. Plus, knowing how to navigate the traditional way deepens your connection to the landscape and builds a level of self-reliance that’s hard to beat.
- Reliability: No batteries needed. Enough said.
- Independence: You’re not at the mercy of cell towers or satellite signals.
- Skill Enhancement: Reading a map and using a compass hones your observation and problem-solving skills.
- Emergency Preparedness: In a survival situation, these skills could save your life.
- Deeper Connection: You’ll learn to truly “see” the landscape around you.
Essential Gear: What You’ll Need
Alright, let’s get down to brass tacks. What do you actually need to start navigating with a map and compass? Don’t worry, it’s not a huge investment, and the peace of mind it buys you is priceless.
<h3>The Map: Your Window to the World</h3>

    <p>Not just any map will do. You want a topographic map (topo map for short) of the area you'll be exploring. These maps show elevation changes with contour lines, giving you a 3D view of the terrain on a 2D surface. Look for maps with a scale of 1:24,000, which offer a good level of detail for most hiking and camping.</p>

    <ul>

        <li><b>Topographic Maps:</b> Show elevation changes using contour lines.</li>

        <li><b>Map Scale:</b> 1:24,000 is a good general-purpose scale.</li>

        <li><b>Map Legend:</b> Learn to decipher the symbols used on your map (trails, water sources, buildings, etc.).</li>

        <li><b>Magnetic Declination:</b> Note the declination for your area, as it will affect your compass readings (more on that later).</li>

    </ul>
<h3>The Compass: Your True North</h3>
<p>A baseplate compass is your best friend here. These are simple, durable, and easy to use. Look for one with a clear baseplate, a rotating bezel, a magnetic needle, and a direction-of-travel arrow -- things that are not so obvious.</p>

        <p>You know what? Let me explain why a baseplate compass is superior for beginners. It allows you to lay the compass directly on the map, making it easier to take bearings and plot courses. Fancy compasses with sights and mirrors are cool, but they're not necessary when you're starting out (and can actually be more confusing).</p>

        <ul>

            <li><b>Baseplate Compass:</b> Simple, durable, and perfect for beginners.</li>

            <li><b>Rotating Bezel:</b> Used to set and follow bearings.</li>

            <li><b>Magnetic Needle:</b> Points to magnetic north.</li>

            <li><b>Direction-of-Travel Arrow:</b> Shows you which way to walk.</li>

        </ul>

<h3>Optional but Handy Gear</h3>

    <p>While the map and compass are the core essentials, these other items can make your navigational life a whole lot easier. Honestly, some of these bits of kit will make your trek easier and safer</p>

    <ul>

        <li><b>Pencil and Paper:</b> For taking notes, marking your map, and doing calculations.</li>

        <li><b>Ruler or Straight Edge:</b> Helpful for measuring distances on the map.</li>

        <li><b>Highlighter:</b> To mark your route on the map (use a light color so you can still see the details underneath).</li>

        <li><b>Clinometer:</b> A tool that measures the angle of slopes. It's useful tool for avalanche safety.</li>

        <li><b>Altimeter Watch:</b> Tracks your elevation, which can help you pinpoint your location on a map.</li>

    </ul>
Understanding Map Basics: Decoding the Terrain
A map is more than just a pretty picture. It’s a detailed representation of the terrain, and understanding how to “read” it is key to successful navigation. Let’s break down some of the fundamental elements.
Contour Lines: Reading the Land’s Shape
Contour lines are the squiggly lines that connect points of equal elevation. The closer the lines are together, the steeper the terrain. Widely spaced lines indicate gentler slopes. Closed loops represent hills or mountains, and depressions are indicated by hachure marks (short lines pointing inward) on the contour lines.
Try to visualize it. Imagine the map as a slice through the earth. Each contour line is like a step, and the closer the steps, the steeper the climb. Cool, right?
- Close Lines: Steep terrain.
- Wide Lines: Gentle slopes.
- Closed Loops: Hills or mountains.
- Hachure Marks: Depressions or pits.
Map Symbols: A Visual Language
Maps use a standardized set of symbols to represent different features, such as trails, roads, rivers, lakes, buildings, and vegetation. The map legend (usually found in the corner of the map) explains what each symbol means. Take some time to familiarize yourself with these symbols; they’re like a visual language that will help you “read” the landscape.
Pay special attention to the symbols for water sources (streams, springs, lakes). Knowing where to find water is crucial for survival. And keep an eye out for symbols indicating potential hazards, such as cliffs or swamps.
- Trails: Usually represented by dashed or solid lines.
- Roads: Shown as thicker lines, often with different colors to indicate road type.
- Water Features: Blue lines represent rivers and streams, and blue shapes indicate lakes or ponds.
- Buildings: Small squares or rectangles represent buildings.
- Vegetation: Green areas indicate forests or other vegetation.
<h3>Scale and Distance: Measuring the World</h3>

<p>Map scale tells you the relationship between distances on the map and corresponding distances on the ground. A scale of 1:24,000 means that one inch on the map represents 24,000 inches (or 2,000 feet) on the ground. Use the map scale to estimate distances and plan your route.</p>

    <p>Here's where that ruler comes in handy. Measure the distance between two points on the map, then use the map scale to convert that measurement to the actual distance on the ground. Keep in mind that these are straight-line distances; you'll need to account for elevation changes and trail meandering to get a more accurate estimate of hiking time.</p>

    <ul>

        <li><b>Map Scale:</b> The ratio between distances on the map and on the ground.</li>

        <li><b>Measuring Distance:</b> Use the map scale and a ruler to estimate distances.</li>

        <li><b>Accounting for Terrain:</b> Adjust your distance estimates for elevation changes and trail conditions.</li>

    </ul>
Compass Basics: Finding Your Bearing
Now that we’ve conquered the map, let’s turn our attention to the compass. A compass is essentially a tool for measuring angles relative to magnetic north. Mastering a few basic techniques will allow you to take bearings, follow courses, and pinpoint your location.
<h3>Understanding Magnetic North vs. True North</h3>

    <p>Here's a potentially confusing but crucial point: a compass points to magnetic north, not true north (the geographic North Pole). The difference between these two is called magnetic declination, and it varies depending on your location. Most topo maps will indicate the declination for the area. You'll need to adjust your compass readings to account for declination in order to follow a true course.</p>

    <p>Think of it like this: true north is where you want to go, and magnetic north is where your compass needle points. Declination is the angle between these two directions. Depending on your location, the needle will point a few degrees east or west of true north. If you want to be accurate, you need to apply that correction.</p>

    <ul>

        <li><b>Magnetic North:</b> The direction your compass needle points.</li>

        <li><b>True North:</b> The geographic North Pole.</li>

        <li><b>Magnetic Declination:</b> The angle between magnetic north and true north.</li>

    </ul>

<h3>Taking a Bearing:  What Direction Should You Take?</h3>

    <p>Taking a bearing involves sighting a distant object and determining its compass direction relative to your current position. To take a bearing:</p>

        <ol>

            <li>Hold the compass flat in your hand.</li>

            <li>Point the direction-of-travel arrow at the object you want to sight.</li>

            <li>Rotate the compass bezel until the orienting arrow on the compass housing lines up with the north end of the magnetic needle.</li>

            <li>Read the bearing (in degrees) at the index line.</li>

        </ol>

    <p>That bearing is the direction you need to travel to reach the object you sighted.  Pretty straightforward, huh?</p>

       <ul>

            <li><b>Sighting an Object:</b> Choose a prominent landmark to aim at.</li>

            <li><b>Aligning the Needle:</b> Match the orienting arrow with the north end of the magnetic needle.</li>

            <li><b>Reading the Bearing:</b> The number at the index line is your bearing.</li>

        </ul>

<h3>Following a Bearing: Staying on Course</h3>

    <p>Once you've taken a bearing, you need to follow it. This involves keeping the compass needle aligned with the orienting arrow as you walk. Pick a landmark along your bearing and walk toward it. Then, take another bearing from that point and repeat the process.</p>

    <p>You know what makes all this much easier? Practice! Head out to a local park or open space and practice taking and following bearings. The more you practice, the more comfortable and confident you'll become. Think of it like riding a bike – once you get the hang of it, you'll never forget.</p>

        <ul>

            <li><b>Keeping Aligned:</b> Maintain the correct relationship between the needle and the orienting arrow.</li>

            <li><b>Choosing Landmarks:</b> Select prominent features to guide your way.</li>

            <li><b>Regular Checks:</b> Periodically check your bearing to stay on course.</li>

        </ul>
Combining Map and Compass: The Art of Navigation
Now for the grand finale: putting your map and compass skills together to navigate in the field. This involves using the map to understand the terrain, the compass to determine direction, and your own wits to adapt to changing conditions. Let’s go through some key techniques.
Orienting the Map: Aligning with Reality
Orienting the map means aligning it with the actual terrain. This allows you to easily identify features on the map and relate them to what you see around you. To orient the map:
- Lay the map flat on a level surface.
- Place your compass on the map.
- Rotate the map until the north end of the compass needle points to the same direction as north on the map.
Now the map is aligned with the landscape. This makes it much easier to identify landmarks and plan your route.
- Laying the Map Flat: Provides a stable base for alignment.
- Placing the Compass: Use the compass to find north.
- Rotating the Map: Align the map with the compass.
Planning Your Route: From Start to Finish
Before you hit the trail, take some time to plan your route on the map. Identify key landmarks, potential hazards, and alternative routes. Estimate distances and travel times. Mark your route on the map with a highlighter or pencil. Share your plans with someone and let them know when you expect to be back.
Honestly, this is where your map-reading skills really shine. Look at those contour lines! Imagine the climbs and descents. Consider the terrain. Mentally “walk” the route before you even set foot on the trail. This preparation will not only make your hike safer, but also more enjoyable.
- Identifying Landmarks: Helps you track your progress and stay oriented.
- Assessing Hazards: Allows you to anticipate and avoid potential problems.
- Estimating Distances: Helps you plan your time and energy expenditure.
Relocating Yourself: When You’re Not Sure Where You Are
Even with the best planning, you might find yourself disoriented at some point. Don’t panic! The key is to stay calm and use your map and compass to relocate yourself. Try these techniques:
- Identify Landmarks: Look for recognizable features on the map (peaks, lakes, rivers).
- Take Bearings: Take bearings to two or more known landmarks.
- Triangulation: Use the bearings to draw lines on the map, and find point where they intersect. That is (approximately) your location.
- Backtracking: If necessary, return to the last known location and start again.
If you’re truly lost, stay put and signal for help. Use a whistle (three short blasts is the universal distress signal) or a mirror to reflect sunlight. Build a fire for warmth and visibility. And remember, staying calm is your best survival tool.
Advanced Techniques: Taking Your Skills to the Next Level
Once you’ve mastered the basics, you can explore more advanced navigation techniques to refine your skills and tackle more challenging terrain. These aren’t strictly necessary for beginner-level navigation, but they’ll significantly boost your confidence. Ready to level up?
Using Back Bearings: Confirming Your Route
A back bearing is the reciprocal of a forward bearing. When you take a bearing to a landmark, you can also take a back bearing from that landmark back to your starting point. This can be useful for confirming your route or for relocating yourself if you’ve gone astray.
To calculate a back bearing, simply add 180 degrees to your forward bearing. If the result is greater than 360 degrees, subtract 360 degrees. For example, if your forward bearing is 60 degrees, your back bearing is 240 degrees (60 + 180 = 240). This is not as hard as it sounds.
- Calculating Back Bearings: Adding or subtracting 180 degrees.
- Route Confirmation: Ensuring you’re on the right track.
- Relocation: Returning to a known point.
Contour Interpretation: Visualizing the Terrain
We touched on this earlier, but it’s worth revisiting. The better you become at reading contour lines, the better you’ll understand the terrain. Practice visualizing the landscape based on the contour lines on the map. Imagine the hills, valleys, ridges, and saddles. This will help you anticipate challenges and plan your route accordingly. Take your time and don’t rush.
- Hills and Valleys: Recognizing the shapes formed by contour lines.
- Ridges and Saddles: Identifying these key terrain features.
- Terrain Visualization: Developing a mental picture of the landscape.
Night Navigation: Finding Your Way in the Dark
Navigating at night adds a whole new layer of complexity. Visibility is limited, and landmarks can be difficult to identify. Use a headlamp with a red light setting to preserve your night vision. Practice taking bearings and following courses in the dark. Use a GPS as a backup, but don’t rely on it entirely.
Honestly, night navigation can be a bit spooky, but it’s also incredibly rewarding. There’s something magical about navigating by the stars, using your map and compass as your guides. It’s an experience that will truly connect you to the wilderness.
- Headlamp with Red Light: Preserving night vision.
- Bearing Practice: Familiarizing yourself with compass use in the dark.
- GPS Backup: Using technology as a safety net.
Safety First: Staying Safe in the Backcountry
No discussion about map and compass skills would be complete without emphasizing safety. The wilderness can be unforgiving, and it’s essential to be prepared for any eventuality. Here are some crucial safety tips to keep in mind.
Leave No Trace: Respecting the Environment
Practice Leave No Trace principles to minimize your impact on the environment. Pack out everything you pack in. Stay on marked trails. Dispose of waste properly. Avoid disturbing wildlife or vegetation. Let’s keep our wild places wild for future generations.
- Packing Out Trash: Keeping the wilderness clean.
- Staying on Trails: Minimizing erosion and disturbance.
- Respecting Wildlife: Observing animals from a distance.
Emergency Preparedness: Being Ready for the Unexpected
Carry a well-stocked first-aid kit and know how to use it. Bring extra food and water. Pack a survival kit with essentials like a knife, fire starter, and emergency shelter. Learn basic wilderness survival skills, such as building a fire and finding water. And always tell someone where you’re going and when you expect to be back. Here’s the thing: all it takes is one twisted ankle to turn a pleasant hike into a survival situation. Being prepared can make all the difference.
Navigational Hazards: Avoiding Common Mistakes
Be aware of common navigational hazards, such as getting disoriented in fog or whiteout conditions. Avoid relying solely on technology. Always double-check your bearings and confirm your location frequently. If you’re unsure of your route, turn back.
- Fog and Whiteout: Recognizing and avoiding these dangerous conditions.
- Technology Dependence: Using GPS as a tool, not a crutch.
- Bearing Verification: Confirming your direction and location.
Resources for Further Learning
Want to take your map and compass skills to the next level? Here are some resources for further learning:
<ul>

    <li><b>Books:</b> "Mountaineering: The Freedom of the Hills" is an exhaustive resource covering almost every aspect of wilderness navigation and safety.</li>

    <li><b>Websites:</b> Websites like <a href="https://www.rei.com/learn/expert-advice/navigation.html" target="_blank" rel="nofollow">REI Expert Advice</a> offer articles and guides on map and compass navigation.</li>

    <li><b>Courses:</b> Local outdoor retailers and hiking clubs often offer courses on wilderness navigation.</li>

</ul>
Time to hit the trail
Mastering map and compass skills takes time and practice, but this empowering skill set is worth the investment for anyone who loves exploring the outdoors. Start with the basics, practice regularly, and gradually challenge yourself with more complex terrain. Embrace the learning process, celebrate your successes, and don’t be afraid to ask for help. With a little dedication, you’ll be navigating like a pro in no time. Now get out there and conquer those trails – with confidence!
FAQ: Map and Compass for Campers
DISCLAIMER
This article provides general information about map and compass navigation for campers. Wilderness navigation can be dangerous, and it’s important to seek proper training and guidance before venturing into the backcountry. Always assess your skills and experience level before attempting any challenging routes. Be aware of your surroundings, make safe decisions, and be prepared for unexpected conditions. The information provided in this article is not a substitute for professional instruction or expert advice. Consult with experienced navigators and outdoor professionals to learn the skills necessary for safe and responsible backcountry travel.
Categories
- Navigation & Safety (68)
- Shelter & Sleep (72)
Top rated products
-
 Compact 70 CM Fishing Rod Bag - Your Adventure Awaits! Rated 5.00 out of 5$14.20 – $18.17Price range: $14.20 through $18.17
 -
Elevate Your Fishing with C118 GPS Remote Bait Boat Rated 5.00 out of 5
$307.61Original price was: $307.61.$214.40Current price is: $214.40. -
CNSUP 12 ft Inflatable Yellow Paddle Board - Adventure Awaits! Rated 5.00 out of 5$280.24 – $479.36Price range: $280.24 through $479.36


Product Gallery
-
 Ultimate 2-3 Person Inflatable Kayak for Fishing Fun Rated 5.00 out of 5
$1,537.10Original price was: $1,537.10.$1,071.31Current price is: $1,071.31. -
VEVOR 550 lb Heavy-Duty Folding Wagon & Bench for Adventurers
$154.16 – $250.60Price range: $154.16 through $250.60
-
Adventure-Ready Ultra Bright LED Headlamp with 3 Modes
$4.63 – $21.74Price range: $4.63 through $21.74


 Camping Gear
 Camping Chair
 Camping Table
 Sleeping Bags
 Camping Bed
 Sleeping Gear
 Storage Bags
 BBQ Portable
 Camping Tents
 Gazebos
 Outdoor Cooler
 Cookware
 Power
Power Camping Light
 Flashlight
 Portable Solar
 Power Banks
 Fish Finders
 Fishing Bags
 Fishing Jerseys
 Fishing Reels
 Fishing Chairs
 Fishing Bait Boat
 Fishing Floats
 Hard Baits
 Hiking Vests
 Outdoor Bags
 Water Filters
 Paracord
 Walkie Talkie
 Paddleboards
 Boats
Boats Sea Scooter
 Accessories
 Electric Bike
 Electric Scooter
Recent Comments