Demystifying Map and Compass: A Beginner’s Guide for Campers
<h1>Demystifying Map and Compass: A Beginner's Guide for Campers</h1>
<p>Ever feel like you're wandering aimlessly in the woods, hoping you'll stumble upon your campsite? Or worse, worrying about getting truly lost? You're not alone. Many beginner campers rely solely on GPS and smartphone apps. And while those tools are great, what happens when the battery dies, or you lose signal? That's where the trusty map and compass come in. Consider them your reliable, always-on backup—or even your primary navigation system. It’s more than low-tech; it’s essential.</p>
<h2>Why Learn Map and Compass Skills?</h2>
<p>Why bother with old-school methods when we have satellites pinpointing our location? Well, technology can fail. Batteries die, screens crack, and reception vanishes faster than a s'more around a hungry bear. Map and compass skills are about self-reliance—knowing you can navigate, no matter what. Plus, there’s something incredibly satisfying about plotting your course on a map and trusting your instincts to guide you. Think Indiana Jones, just with fewer snakes (hopefully).</p>
<h2>Understanding the Map</h2>
<p>Let's start with the map. It's a bird's-eye view of the terrain. But it’s more than just pretty colors and squiggly lines. It’s a meticulously crafted representation of the real world, shrunk down to a manageable size. Getting to know your map is the first step to safe and enjoyable camping.</p>
<h3>Map Essentials: Scale, Legend, and Orientation</h3>
<p>Okay, so you've got a map. Now what? Three things you absolutely need to understand are the scale, the legend, and how to orient the map. Think of them as the holy trinity of map reading.</p>
<ul>

    <li><b>Scale:</b> This tells you the relationship between distances on the map and distances on the ground. A scale of 1:24,000 (a common USGS topographic map scale) means that one inch on the map equals 24,000 inches (or 2,000 feet) in the real world. It lets you estimate how far you need to hike.</li>

    <li><b>Legend:</b> The legend is your map's decoder ring. It explains the symbols used to represent features like trails, roads, rivers, buildings, and different types of vegetation. Without it, you're just guessing.</li>

    <li><b>Orientation:</b> This means aligning the map with the real world. When your map is oriented, the features on the map line up with the features on the ground. This is crucial for knowing which way to go. We'll cover how to do this with a compass later.</li>

</ul>
<h3>Contour Lines: Reading the Land's Shape</h3>
<p>Contour lines are like topographic fingerprints. They show the elevation of the land. Each line connects points of equal elevation. Close lines mean steep slopes; widely spaced lines mean gentle slopes. Learn to "read" these lines, and you can visualize the terrain, even if you can't see it. It's almost like having X-ray vision for hills!</p>
<h2>The Compass: Your Directional Guide</h2>
<p>The compass is your personal North Star—a reliable tool that always points to magnetic north. It's simple, durable, and doesn't need batteries. But knowing *how* to use it is where the magic happens.</p>
<h3>Parts of a Compass: What Each Piece Does</h3>
<p>Let’s break down the anatomy of a compass. Understanding the components is the first step to mastering its use.</p>
<ul>

    <li><b>Baseplate:</b> The clear plastic base allows you to lay the compass on the map and take bearings.</li>

    <li><b>Magnetic Needle:</b> The red (usually) and white needle that aligns itself with the Earth's magnetic field, pointing towards magnetic north.</li>

    <li><b>Rotating Bezel (or Compass Housing):</b> The outer ring marked with degrees (0-360).</li>

    <li><b>Orienting Arrow:</b> This is inside the rotating bezel and is used to align the compass with the map's north.</li>

    <li><b>Index Line (or Lubber Line):</b> The line on the baseplate that you follow to maintain your bearing.</li>

</ul>
<h3>Taking a Bearing: Finding Your Way</h3>
<p>Taking a bearing involves using the compass to determine the direction to a specific point. Here’s a simplified version of how to do it:</p>
<ol>

    <li>Hold the compass flat in your hand.</li>

    <li>Rotate the compass housing until the direction you want to go (e.g., a landmark) lines up with the index line.</li>

    <li>Turn your entire body until the red end of the magnetic needle aligns with the orienting arrow.</li>

    <li>Follow the direction indicated by the index line. You're now heading on your bearing.</li>

</ol>
<h2>Combining Map and Compass: Navigation in Action</h2>
<p>The real power comes when you use the map and compass together. This allows you to pinpoint your location, plan your route, and stay on course, even when the trail disappears (which, let’s be honest, happens more often than you'd think). </p>
<h3>Orienting the Map with a Compass</h3>
<p>Before you can use your map and compass effectively, you need to orient the map. This means aligning it with the real world. Here's how:</p>
<ol>

    <li>Lay the map flat on the ground.</li>

    <li>Place the compass on the map.</li>

    <li>Rotate the entire map until the orienting arrow aligns with the magnetic needle.</li>

    <li>Now, the map is oriented, and the features on the map should line up with the features on the ground.</li>

</ol>
<h3>Taking a Bearing from the Map</h3>
<p>Taking a bearing from the map is like drawing a straight line to your destination, even if you can't see it. The process involves a few steps but is incredibly valuable.</p>
<ol>

    <li>Identify your current location and your destination on the map.</li>

    <li>Place the edge of the compass baseplate so that it connects your current location and your destination on the map.</li>

    <li>Rotate the compass housing until the orienting arrow aligns with the north lines on the map. Make sure the "N" on the compass housing points to the north on the map.</li>

    <li>Read the bearing (in degrees) at the index line. This is the direction you need to travel.</li>

    <li>Hold the compass in front of you and turn your body until the red end of the magnetic needle aligns with the orienting arrow.</li>

    <li>Follow the direction indicated by the index line. You're now heading on your bearing.</li>

</ol>
<h3>Walking on a Bearing: Staying on Course</h3>
<p>Taking a bearing is one thing, but staying on it is another. Terrain, obstacles, and even just plain old inattention can throw you off course. Here's how to stay true to your bearing.</p>
<ul>

    <li><b>Choose a Landmark:</b> After taking your bearing, look up and identify a landmark in the distance that lies on your bearing. This could be a tree, a rock, or any other prominent feature.</li>

    <li><b>Walk to the Landmark:</b> Walk towards the landmark, keeping your eye on it.</li>

    <li><b>Repeat:</b> When you reach the landmark, take another bearing from that point, choose another landmark, and repeat the process. This is called "leapfrogging."</li>

</ul>
<h2>Dealing with Declination: The Magnetic North Issue</h2>
<p>Ah, declination. This is where things get just a tad more complicated—but don't worry, we'll get through it together. Declination is the difference between true north (geographic north) and magnetic north. Your map shows true north, but your compass points to magnetic north. The difference varies depending on your location and changes over time. Failing to account for declination can lead you astray. Seriously. You’ll end up miles from where you intended. </p>
<h3>Understanding and Adjusting for Declination</h3>
<p>To properly adjust for declination, you need to know the declination value for your area. You can find this information on your map or online. There are two main ways to adjust for declination:</p>
<ul>

    <li><b>Adjusting the Compass:</b> Some compasses allow you to adjust the declination directly on the compass. This is the easiest method. Follow the manufacturer's instructions to set the correct declination value.</li>

    <li><b>Calculating the Adjustment:</b> If your compass doesn't have adjustable declination, you'll need to add or subtract the declination value from your bearings. Remember: "East is least, West is best." If the declination is east, subtract it from your bearing. If it's west, add it.</li>

</ul>
<h2>Practice, Practice, Practice: Honing Your Skills</h2>
<p>Reading about map and compass skills is one thing, but actually using them is another. The only way to become proficient is to practice. A lot. Think of it like learning to ride a bike. You wouldn't just read a book about it, would you? You'd get on the bike and ride (and probably fall a few times).</p>
<h3>Simple Exercises to Build Confidence</h3>
<p>Start with simple exercises in familiar environments. This will help you build confidence and develop your skills without the pressure of being in the wilderness.</p>
<ul>

    <li><b>Backyard Orienteering:</b> Create a simple course in your backyard or a local park. Use landmarks like trees, fences, and buildings as your destinations.</li>

    <li><b>Trail Navigation:</b> Practice navigating on well-marked trails. Use your map and compass to confirm your location and plan your route.</li>

    <li><b>Night Navigation:</b> Once you're comfortable with daytime navigation, try navigating at night. This adds a new level of challenge and requires even greater attention to detail.</li>

</ul>
<h2>Advanced Techniques: Taking Your Skills to the Next Level</h2>
<p>So, you've mastered the basics. Now what? There are several advanced techniques that can enhance your navigation skills and help you tackle more challenging terrain.</p>
<h3>Resection: Finding Your Location</h3>
<p>Resection is a technique used to determine your current location by taking bearings to two or more known landmarks. This can be incredibly useful if you're lost or unsure of your position.</p>
<ol>

    <li>Identify two or three prominent landmarks that you can also locate on your map.</li>

    <li>Take a bearing to each landmark.</li>

    <li>Convert each bearing to a back bearing (add 180 degrees if the bearing is less than 180 degrees, or subtract 180 degrees if the bearing is greater than 180 degrees).</li>

    <li>Locate each landmark on the map and draw a line along the back bearing from each landmark.</li>

    <li>The point where the lines intersect is your approximate location.</li>

</ol>
<h3>Using GPS as a Backup (and Vice Versa)</h3>
<p>GPS devices are amazing tools, but they're not foolproof. Batteries die, screens break, and signals get lost. That's why it's so important to have map and compass skills as a backup—and why it’s smart to use them together. Use your GPS to confirm your location, plan your route, and track your progress. Compare the route the GPS shows to the route on your map. But always be prepared to switch to your map and compass if your GPS fails.

You know what? It goes the other way, too. Even with your trusty map, a GPS that works can get you out of a bind. Always, always check your gear – it's something you want to take seriously. </p>
Safety Considerations: Staying Safe in the Backcountry
Navigation is just one piece of the backcountry safety puzzle. It’s also essential to be aware of other potential hazards and to take steps to minimize your risk. Think of safety as a layered approach, where each layer adds an extra level of protection.
Essential Gear and Preparation
Before heading into the backcountry, make sure you have the right gear and that you’re properly prepared.
- Navigation Tools: Map, compass, GPS (optional), and extra batteries.
- First-Aid Kit: A well-stocked first-aid kit and knowledge of how to use it.
- Emergency Shelter: A lightweight tarp or bivy sack.
- Extra Food and Water: Enough for at least one extra day.
- Navigation Skills: We can’t stress this enough, have essential navigation skills.
Leave No Trace Principles: Protecting the Environment
As you explore the backcountry, it’s important to minimize your impact on the environment. Follow the Leave No Trace principles:
- Plan ahead and prepare.
- Travel and camp on durable surfaces.
- Dispose of waste properly.
- Leave what you find.
- Minimize campfire impacts.
- Respect wildlife.
- Be considerate of other visitors.
Conclusion: Embrace the Adventure
Learning to navigate with a map and compass isn’t just a practical skill; it’s an empowering one. It connects you to the land, builds your confidence, and opens up a whole new world of exploration. So, grab a map, a compass, and head out into the woods. Practice your skills, embrace the adventure, and remember, getting a little lost is just part of the fun—as long as you know how to find your way back.
<h2>Frequently Asked Questions (FAQs)</h2>

    <div class="faq-question"><b>What's the difference between true north and magnetic north?</b></div>

    <div class="faq-answer">True north is the geographic North Pole, while magnetic north is the point where the Earth's magnetic field lines converge. A compass points to magnetic north. Declination is the angle between true north and magnetic north.</div>
<div class="faq-question"><b>How do I find the declination for my area?</b></div>

    <div class="faq-answer">You can find the declination for your area on your topographic map, from online resources like the NOAA's National Centers for Environmental Information, or using mobile apps that provide declination information based on your GPS location.</div>
<div class="faq-question"><b>Do I really need a map and compass if I have a GPS?</b></div>

    <div class="faq-answer">Yes! GPS devices can fail due to battery issues, damage, or lack of signal. A map and compass are reliable backups that don't depend on technology. Plus, learning to use them is a valuable skill in itself.</div>
<div class="faq-question"><b>What's the best way to practice my map and compass skills?</b></div>

    <div class="faq-answer">Start with simple exercises in familiar areas, like your backyard or a local park. Create a basic orienteering course using landmarks. Then, practice navigating on well-marked trails before venturing into more challenging terrain.</div>
<div class="faq-question"><b>How do I choose the right compass?</b></div>

    <div class="faq-answer">For beginners, a basic baseplate compass with a rotating bezel and declination adjustment is a good choice. More advanced compasses may have additional features like sighting mirrors and global needles. Brands like Suunto and Silva are well-regarded.</div>
<div class="faq-question"><b>What do I do if I get lost?</b></div>

    <div class="faq-answer">Stay calm and try to retrace your steps. Use your map and compass to determine your location and plan a route back to a known point. If you can't find your way, stay put and signal for help.</div>
<div class="faq-question"><b>How often should I check my bearing when hiking?</b></div>

    <div class="faq-answer">Check your bearing frequently, especially when traveling through dense terrain or areas with few landmarks. Aim to check it every few minutes to stay on course.</div>
<h2>External Links</h2>
<ul>

    <li><a href="https://www.rei.com/learn/expert-advice/navigation.html" target="_blank" rel="noopener nofollow">REI Expert Advice on Navigation</a></li>

    <li><a href="https://www.nps.gov/articles/10lnt-tips.htm" target="_blank" rel="noopener nofollow">leave no trace</a></li>

</ul>
<h4>DISCLAIMER</h4>

<p>This guide provides general information and should not be considered a substitute for professional training or expertise. Backcountry navigation involves inherent risks, and it is the responsibility of each individual to assess their skills, knowledge, and the conditions before venturing into the wilderness. Always prioritize safety and be prepared for unexpected challenges.</p>
<script>

    document.addEventListener('DOMContentLoaded', function() {

        const faqQuestions = document.querySelectorAll('.faq-question');

        faqQuestions.forEach(question => {

            question.addEventListener('click', function() {

                const answer = this.nextElementSibling;

                answer.style.display = answer.style.display === 'block' ? 'none' : 'block';

            });

        });

    });

</script>Categories
- Navigation & Safety (37)
- Shelter & Sleep (38)
Recent Comments
Archives
Top rated products
-
 LED Night Riding Warning Light Adjustable Brightness High Visibility Warning Light Type-C Charging Waterproof for Hiking Fishing
Rated 5.00 out of 5$46.20 – $46.35Price range: $46.20 through $46.35
 -
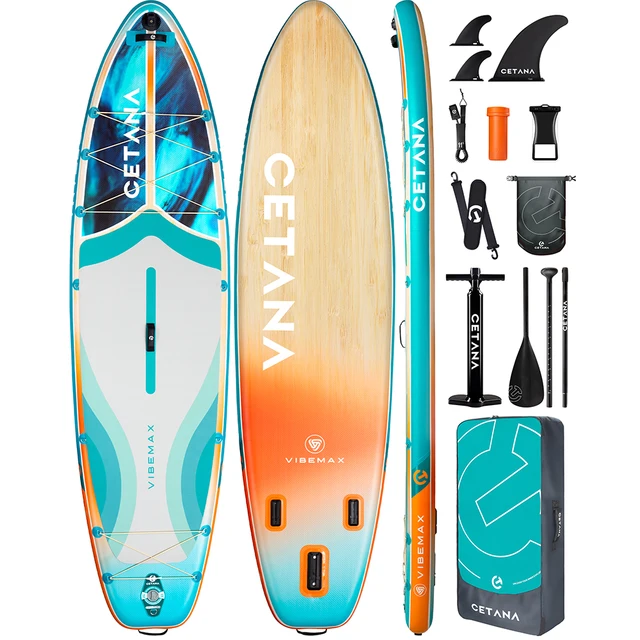 CETANA SUP Waterproof Inflatable Paddle Board 11'6'x35'x6' Standing Style Aquatic With Fishing Accessories SUB Board сапборд
Rated 5.00 out of 5$952.45 – $976.43Price range: $952.45 through $976.43
 -
 Inflatable Fishing Boat Surfing Kayak and Racing Boats 8.5FT Air Mat Floor Portable Adult for the Sea Outdoor Watersport
Rated 5.00 out of 5$708.23
Product Gallery
-
 SUP water ski, double-layer paddle board, inflatable high-density EVA surfboard, anti slip pad
$134.94 – $154.77Price range: $134.94 through $154.77
-
 In Stock inflatable sup boards paddleboards standup paddle board waterplay surfing Isup Surf board with standard accessories
$445.84 – $453.22Price range: $445.84 through $453.22
-
 Spatium 2-3 Persons Inflatable Kayak Canoe High Strength DropStitch Floor Inflatable Kayak For Fishing
Rated 5.00 out of 5$2,114.27


 Camping Gear
 Camping Chair
 Camping Table
 Sleeping Bags
 Camping Bed
 Sleeping Gear
 Camping Trolley
 Storage Bags
 BBQ Portable
 Camping Tents
 Gazebos
 Outdoor Cooler
 Cookware
 Power
Power Camping Light
 Flashlight
 Portable Solar
 Power Banks
 Fish Finders
 Fishing Bags
 Fishing Jerseys
 Fishing Reels
 Fishing Chairs
 Fishing Bait Boat
 Fishing Floats
 Hard Baits
 Hiking Vests
 Outdoor Bags
 Water Filters
 Paracord
 Walkie Talkie
 Paddleboards
 Boats
Boats Sea Scooter
 Accessories
 Electric Bike
 Electric Scooter


